Manage Participants
- 12 Nov 2024
- 8 Minutes to read
- Print
- PDF
Manage Participants
- Updated on 12 Nov 2024
- 8 Minutes to read
- Print
- PDF
Article summary
Did you find this summary helpful?
Thank you for your feedback
Introduction
Participant represents the companies/signatories that are participating in the survey. This screen basically holds all the information about the participants. This screen also allows the managers to login as a particular participant and to respond or modify responses on behalf of that participant.
Participant List

- Show Filter : Selecting "Show Filter" opens the "Add Filter" dropdown, which contains various options to filter participants, such as Group, Survey, Participant State, and Participant Fields.


- Show Active participant Only? : Selecting this checkbox will display only active participants in the list. By default, both active and inactive participants are shown.
- Participant in Group? : Selecting an item from this dropdown will include only participants associated with a region.
- Participated in Survey? : Selecting an item from this dropdown will include only participants associated with a specific survey.
- Show Participant Fields Filter? : Selecting this checkbox will display all custom participant fields for selection.
- Column Filter : Selecting this will show visible/invisible column.
- Search : Search existing participants by name or internal name or participant code.
- Create new participant: Used to creating a new participant.
- Edit : Used to edit an existing participant details.
- Login as this participant : This feature allows administrators to log in as the selected participant to view how the participant is responding to the survey and to see exactly what the participant sees. Managers can also use this feature to respond to or submit the survey on behalf of the participant.
- Status : Displays the activation status of participants. “Tick” (in green) icon show participant account is active and “!” (in red) shows participant account is inactive.
- Assigned Groups: This displays the number of groups assigned to the participant, depending on the configuration setting FilterByAdminRegion. If set to "NO," it will show the count of all groups assigned to the participant. If set to "YES," it will only show the count of regions that the participant shares in common with the admin.
- Assigned Users: This displays the number of users associated with the user. Clicking the count provides a complete list of these users.
- Show Progress: Clicking on this for a particular participant will display the number of surveys they have submitted, along with their progress. Submitted surveys are marked with a "tick" (in green) icon, while non-submitted surveys are marked with an “!" (in red) mark. Please check below image for the same.

- Show entries : This option allows to show number of entries per page like 10,25,50,100.
- Show Total entries : This option will show page wise entries and total number of entries.
- Previous Next : Selecting this button will change page for entries.
- Copy : Selecting this allow copy the records.
- CSV : Selecting this allow to download CSV file with all records default filename is Participant_list_(Current date)_(Current Time).CSV
- Excel : Selecting this allow to download excel file with all records default filename is Participant_list_(Current date)_(Current Time).XLS
- Show participants without any region : Selecting this checkbox will Show only those participants which are not associated with any region this checkbox will only be visible if config FilterByAdminRegion is "NO"
Create new participant

You have come to this page by clicking add icon on Participant List page.
- Display Name : Name of the participant that will be displayed on the survey frontend.
- Group: Select the groups with which the participant should be associated. The participant will only see surveys under these groups. The available groups will always be filtered based on the admin's region. for more information refer this: FilterByAdminRegion in participant.
- Active : Select/Unselect to toggle the activation/suspension status of the participant respectively.
- Create : Will create the participant in the system with the details entered on the form.
- Cancel : Will take the user back to the Participant List page cancelling the create process.
Once you click on to create button for particular participant after filling up the above information, you will be given further information to fill in, which are optional. Check the below image for the same:

- Update: After adding information about a participant when you click on update, system will update that participant with all the information that you have entered.
- Delete: Even after adding all information when you click on to Delete button, it will give you the message "Are you sure you wish to delete?" with 2 buttons, "OK and "Cancel". Clicking on "OK" will delete that particular participant and will lend you on Manage Participants page and clicking on "Cancel" will not delete that participant.
Edit Participant

You have come to this page by clicking edit icon on Participant List page.
- Display Name : Name of the participant that will be displayed on the survey frontend.
- Group : Select the groups with which the participant should be associated. The participant will only see surveys under these groups. The available groups will always be filtered based on the admin's region. for more information refer this: FilterByAdminRegion in participant.
- Active : Select/Unselect to toggle the activation/suspension status of the participant respectively.
- Login as participant : Will allow administrators to login as the selected participant and see how the survey is being responded by that participant and also can see what that participant is seeing. Using this feature Managers can also respond to or submit the survey on behalf of that participant.
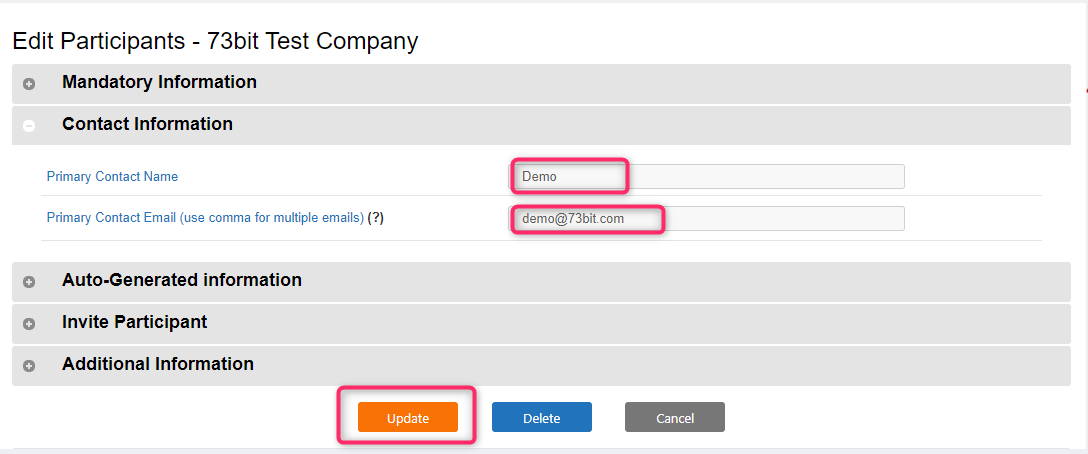
- Contact Information : When ever you want to change primary contact name and email id of particilar participant, go to "Contact Information" - change details and then click on update button to find the change that you made.
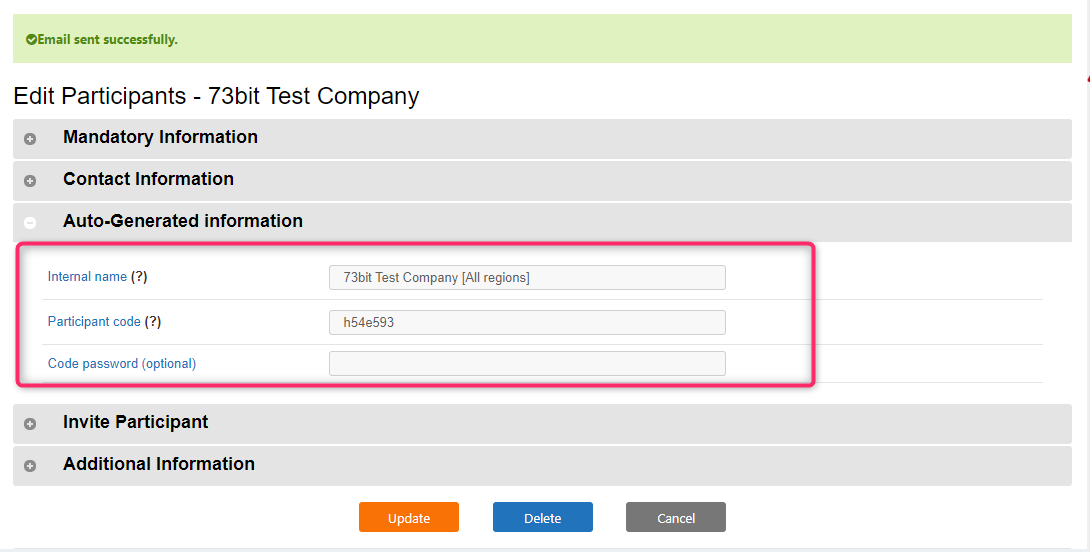
- Auto-Generated information: You can not change this information as the name suggest it is auto generated by probench.
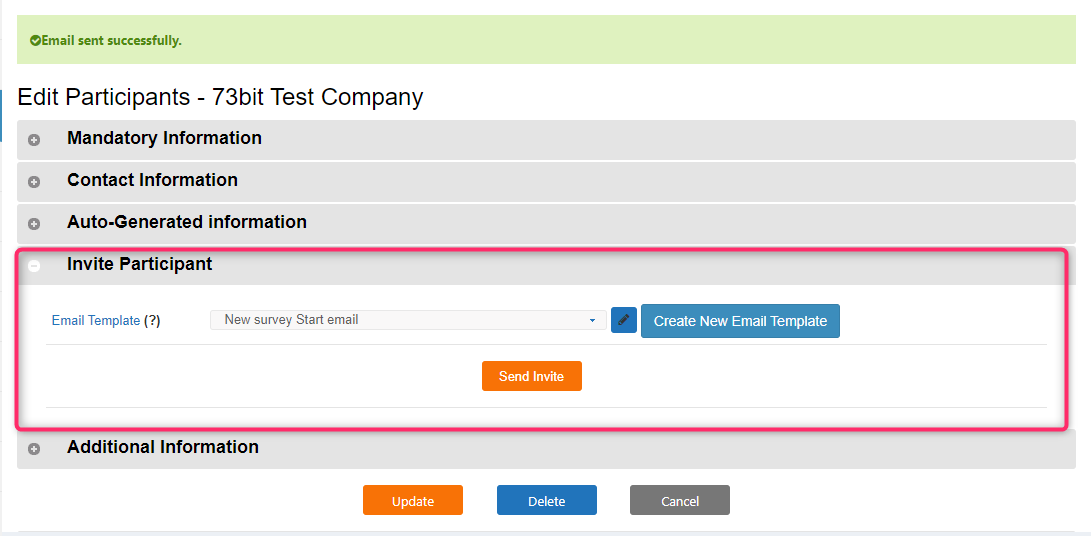
- Invite Participant: You can create your invite email template or use the existing one and send invite.
- Additional Information: You can update the additional information and make changes into it and lastly click on to Uptate All button to update Additional information that you have entered.
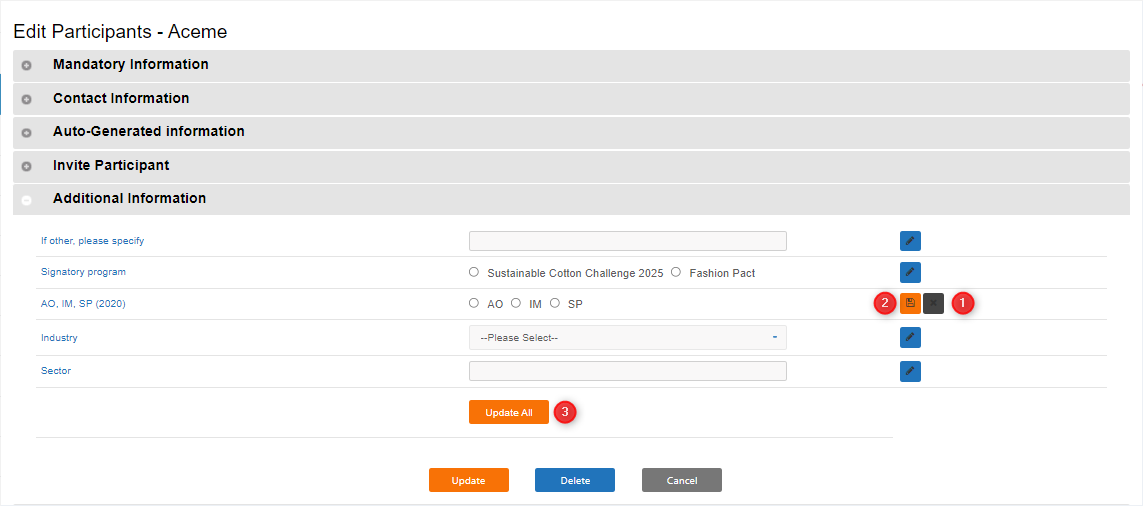


- Edit: By clicking on blue edit button (number 1 in above image), you can edit the details of Additional Information.
- Save: Orange button (number 2 in above image) will save the changes that you have made for particular additional information.
- Update All: This button will update and save all the changes that you have made to all Additional Information fields.
- Update : Will update the participant details modified on the form.
- Delete : Will delete the participant account. You will be asked for confirmation before deleting the participant. All the data related to the participant will be lost and will be unrecoverable.
- Cancel : Will take the user back to the Participant List page cancelling the update process.
Note
In Edit Participant point 8 is used for processing additional information of participants. Additional fields can be created and deleted in Participant Fields.
FAQ's
Why few participants cannot see a survey?
You can face this problem while setting up new survey. You can see that a survey is visible to other participants but not for a particular participant. There could be a possibility that the region of the survey is not same with your participant’s region. You can check field Region of Edit Survey page and Region field of Edit Participant page. Appropriate survey region should match with participant region.
Why do I see additional, different or less fields compared to the above screen capture?
In Probench you can customize the fields on participant page for some practical reasons such as your internal membership code, third party software code like Salesforce etc. So it is common that this page will look different for you.
Logging in as another user?
As an administrator you can log in as another user using one of two ways mentioned below:
If you know the username and password of the user, you can log off as yourself and log in as them. But you are then not logged in as an administrator.
You can go to that Participants Edit screen or search for that participant on the list page and click the person icon
 . This will leave you logged in as yourself, while simulating as if you were logged in as this participant.
 . This will leave you logged in as yourself, while simulating as if you were logged in as this participant.
Please note that this setting is global - i.e. you can only do this for one participant at a time. If you change to another user and then go back to another open window with new user and save from there this will throw an error.
One approach around this limitation would be to open another web browser. As long as they’re separate, they won’t affect each other and you can then log into more than one at the same time. (One for each browser.) (For example, if you’re using Internet Explorer, you can use another browser such as Firefox, Safari, or Google Chrome.)
Why do participants have a “Display name” and an “Internal name”?
Display names are there to deal with the fact that companies can exist more than once within BOB. (e.g. there are four Accenture’s.)
The display name is the name the company would like to be known as and sees when logged into the system. The internal name is whatever managers find useful for reporting within BOB.
So all four could have just “Accenture” as their display name but their internal names would be “Accenture (Aus)” etc. for each version of the company.
Why a participant is not visible in list or on search?
This may be true if a participant is not assigned to any of the region. If you want to see such participants you can select Show participants without any regions? at the top of the list page and you will see all the participants not assigned to any region.
How to add participant fields?
To add participant fields go to List of Participant Fields and click on point 2 and then follow the steps in Add Participant Field. The added participant fields will be displayed in Edit Participant to get more information about participant.
Test survey without making it visible to participants
- Create a new region using Manage Regions .
- Then in Edit Survey at point 11 select that region in checkboxes and unselect all other checkboxes and also point 6 should be ticked and update that survey.
- Then select that region at point 3 in Edit Participant and update any participant.
- Now in same page Edit Participant click on point 6 after update.
- Now you can test survey at end user side without making it visible to participants.
Was this article helpful?